
What Grid Size and Radius Should You Use for a Geo-Grid Scan?
Pick a geo-grid size and radius that match where your customers are. Point spacing, credit costs and starting settings for storefronts and service-area businesses.
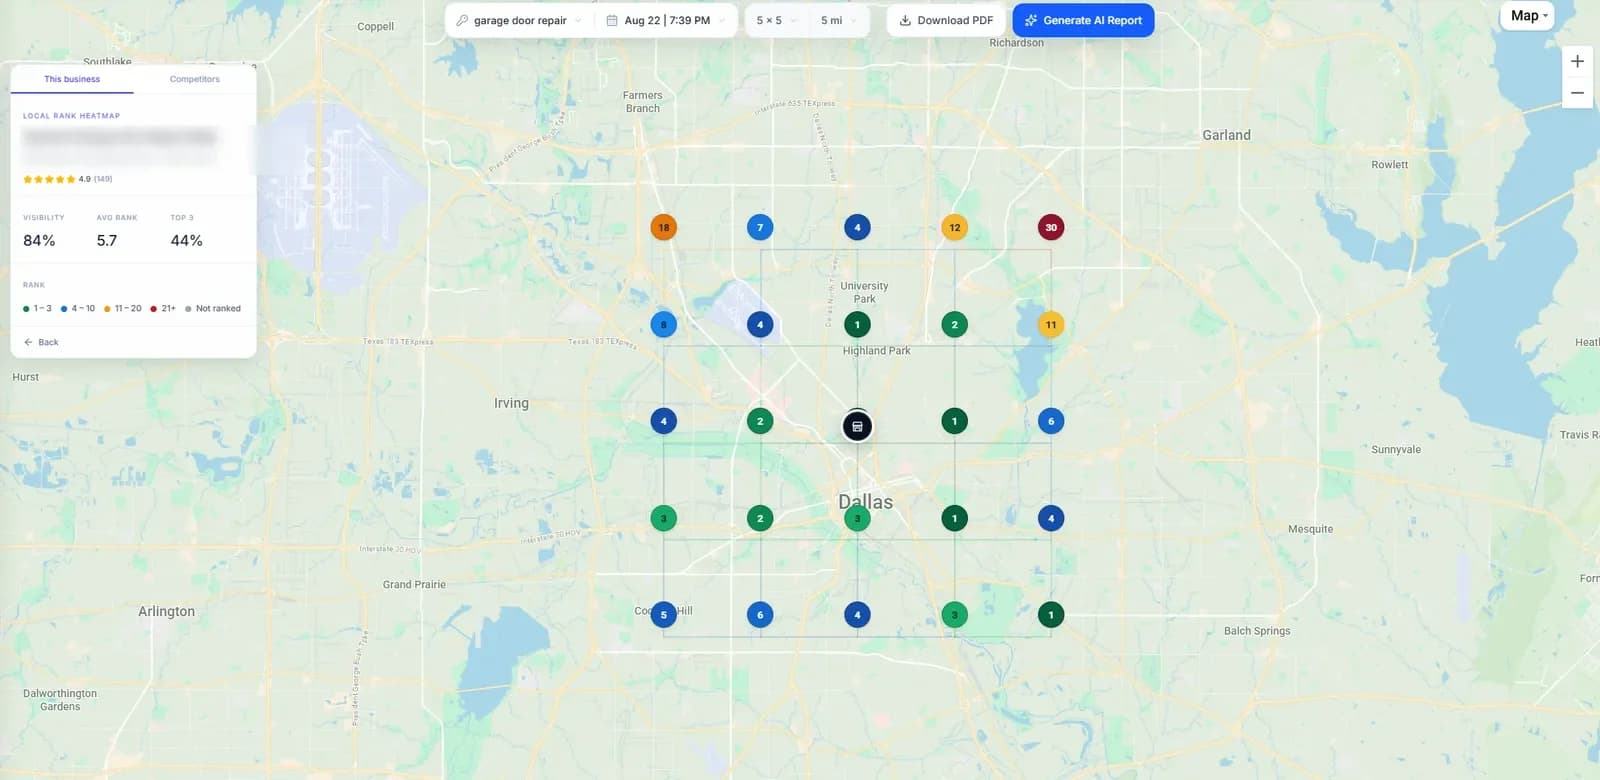
The right geo-grid covers the area your customers search from, with points close enough together to show where your ranking changes. Too small and you miss the edges of your market. Too sparse and you miss what happens between neighborhoods. Too large and you spend credits measuring places no customer would call you from.
This guide gives you a way to choose a grid size and radius, the spacing and credit cost of common settings, and starting points for different kinds of business. If you are new to grids, start with what a geo-grid is.
1. Size, radius and spacing
- Grid size is the number of points per side. A 9 × 9 grid has 81 points.
- Radius is how far the grid reaches from its centre along each axis. A 4-mile radius covers 8 miles from edge to edge.
- Spacing is the distance between neighbouring points: the radius divided by half of one less than the size.
So a 9 × 9 grid with a 4-mile radius puts points 4 ÷ ((9 − 1) ÷ 2) = 1 mile apart. Spacing is the setting people forget, and it decides how much detail you get. Widening the radius without adding points spreads the same number of searches over a bigger area.
2. Choose the radius first
Start from where your customers are, not from a default number. Ask how far people realistically travel to you, or how far you travel to them, and set the radius to reach a little past that edge. You want to see where your ranking fades, so the grid should extend just beyond it.
- Customers come to you (dentist, restaurant, retail): the distance most customers will drive or walk, often a few miles in a city.
- You go to customers (plumber, roofer, HVAC): your real service area, which is often much wider.
- Dense city vs. rural area: a mile in a dense downtown can cross several neighbourhoods with different competitors; in a rural area one mile may contain no competitors at all. Dense areas usually need tighter spacing.
Service-area businesses that hide their address need to place the centre themselves. The service-area business guide covers how.
3. Then choose the grid size
With the radius fixed, pick the size that gives useful spacing. About one mile between points is a practical starting point for most metro areas; tighter spacing for dense downtowns, wider for rural service areas. Larger grids give more detail but cost more per scan, and the cost repeats every time you rescan.
4. Common settings compared
| Grid | Radius | Spacing | Points / credits |
|---|---|---|---|
| 3 × 3 | 1 mile | 1 mile | 9 |
| 5 × 5 | 2 miles | 1 mile | 25 |
| 7 × 7 | 3 miles | 1 mile | 49 |
| 9 × 9 | 4 miles | 1 mile | 81 |
| 9 × 9 | 10 miles | 2.5 miles | 81 |
| 13 × 13 | 6 miles | 1 mile | 169 |
| 21 × 21 | 10 miles | 1 mile | 441 |
Notice the two 9 × 9 rows. Both cost 81 credits, but at a 10-mile radius each point stands for a much larger patch of the map. If your ranking changes within a couple of miles, that grid can skip right over it.
5. Starting points by business type
These are starting points to adjust, not rules. Run one scan, look at where the ranking fades, and widen or tighten from there.
- Neighbourhood storefront (café, salon, dentist in a city): 5 × 5 or 7 × 7, 1–3 miles.
- Destination storefront (specialist clinic, law firm, car dealer): 7 × 7 or 9 × 9, 3–8 miles.
- City-wide service business (plumber, HVAC, electrician): 9 × 9 to 13 × 13, roughly 6–15 miles depending on how far you travel.
- Metro or regional service area (roofer, restoration): 13 × 13 or larger over a wide radius, or several smaller grids centred on the areas that matter most.
The industry guides give trade-specific settings, such as the grid and radius we suggest for HVAC companies or dental practices.
If part of the grid falls over water, a neighbouring city you do not serve or empty land, exclude those points. Excluded points are not searched and not charged, and they stop meaningless results from dragging down your averages.
6. Fit it to your credit budget
Monthly credits are points × keywords × scans per month × locations. Three keywords on a 9 × 9 grid scanned weekly is about 3 × 81 × 4.33 ≈ 1,050 credits a month for one location. The same three keywords on a 13 × 13 grid is about 2,200.
If the budget is tight, keep the grid that answers your question and scan less often, rather than shrinking the grid until it no longer covers your market. A consistent monthly scan is more useful than a weekly one that keeps changing shape. Check plan credit allowances before committing to a routine.
Quick checklist
- Set the radius to reach just past your real customer area.
- Pick a size that gives about a mile between points in a metro area.
- Exclude points you do not serve.
- Check the credit cost × keywords × scans per month.
- Run one scan, see where the ranking fades, and adjust once.
- Then keep the settings fixed.
To try it without an account, the free Google Maps rank checker runs a 3 × 3 grid around any business. To see how each point is searched, read how GridBeacon checks rankings.